Build a Face Filter App for iPhone with ARKit
Getting Started with ARKit
To demonstrate searching for, and using, Svrf Face Filters we will create a basic iOS app that searches for a Face Filter and applies it to your face. For simplicity we will focus exclusively on the iPhone X which allows us to rely on ARKit to handle face detection, face mesh generation, and model morphing. We will cover:
- Installing the SvrfSDK and setting up a Svrf API Key
- Compose an interface with an ARSCNView, a search bar, and a UICollectionView to hold the search results
- Create a
VirtualContentUpdaterclass which implementsARSCNViewDelegate - Devise a
RemoteFaceFilterclass which extendsSCNNodeand can load the 3D model of aSvrfMedia - Plumbing to handle search bar input, showing/hiding the keyboard, etc.
Building the Interface
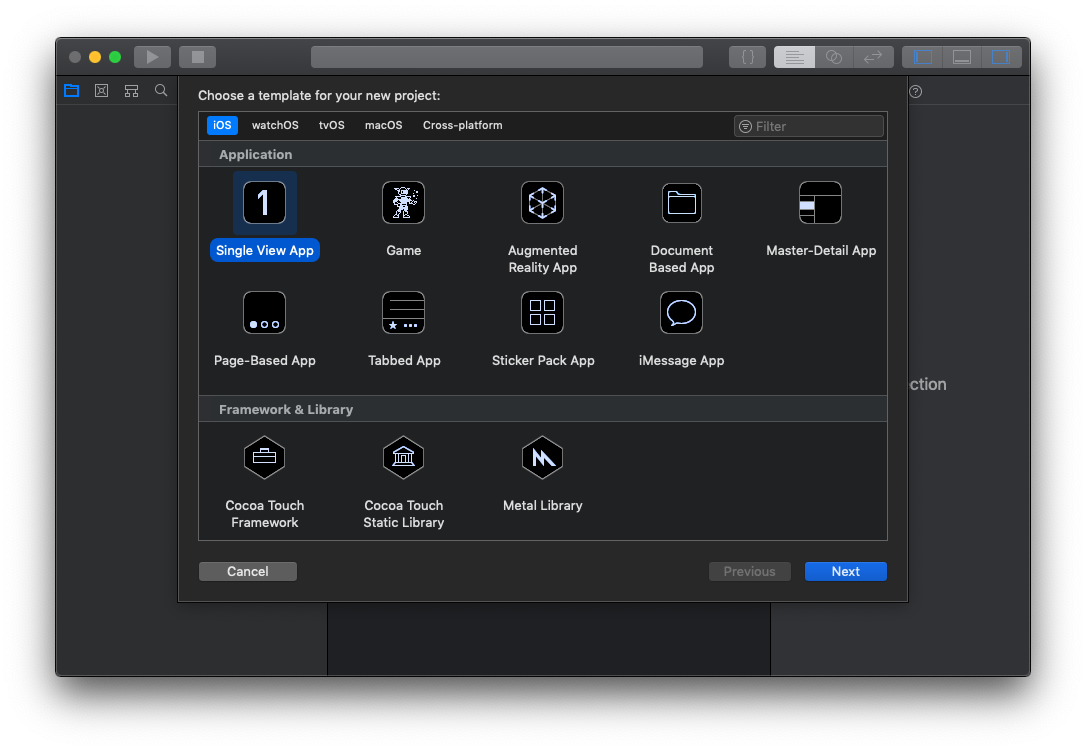
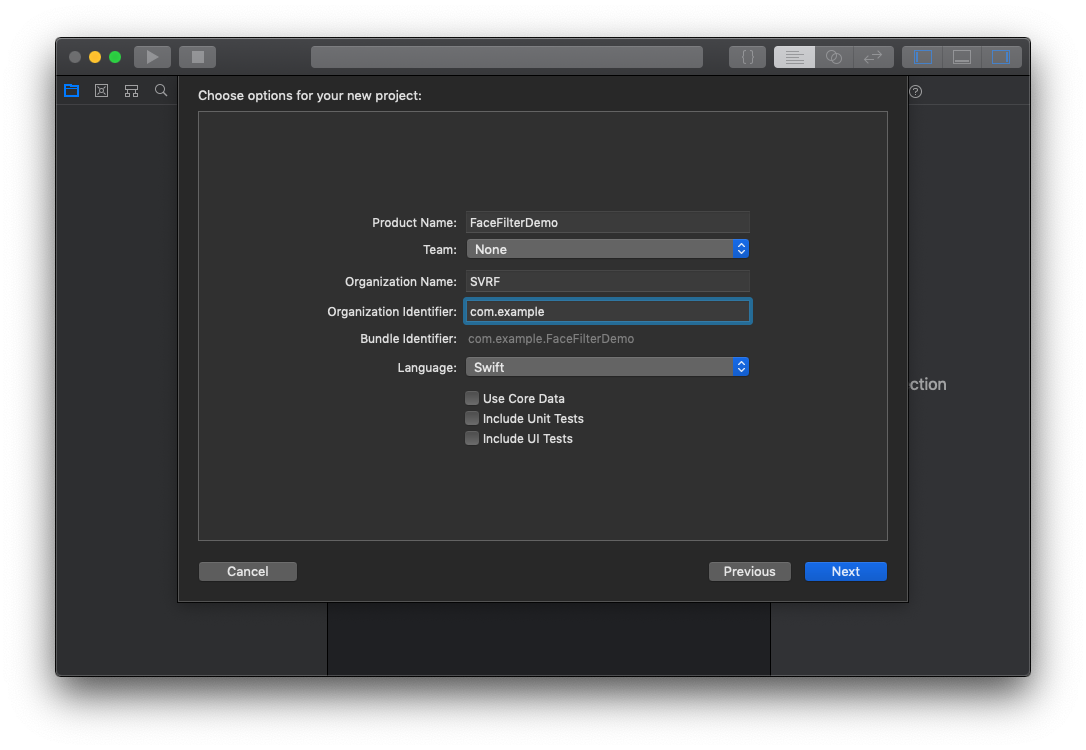
First, let's create a single-view new Xcode project named FaceFilterDemo.
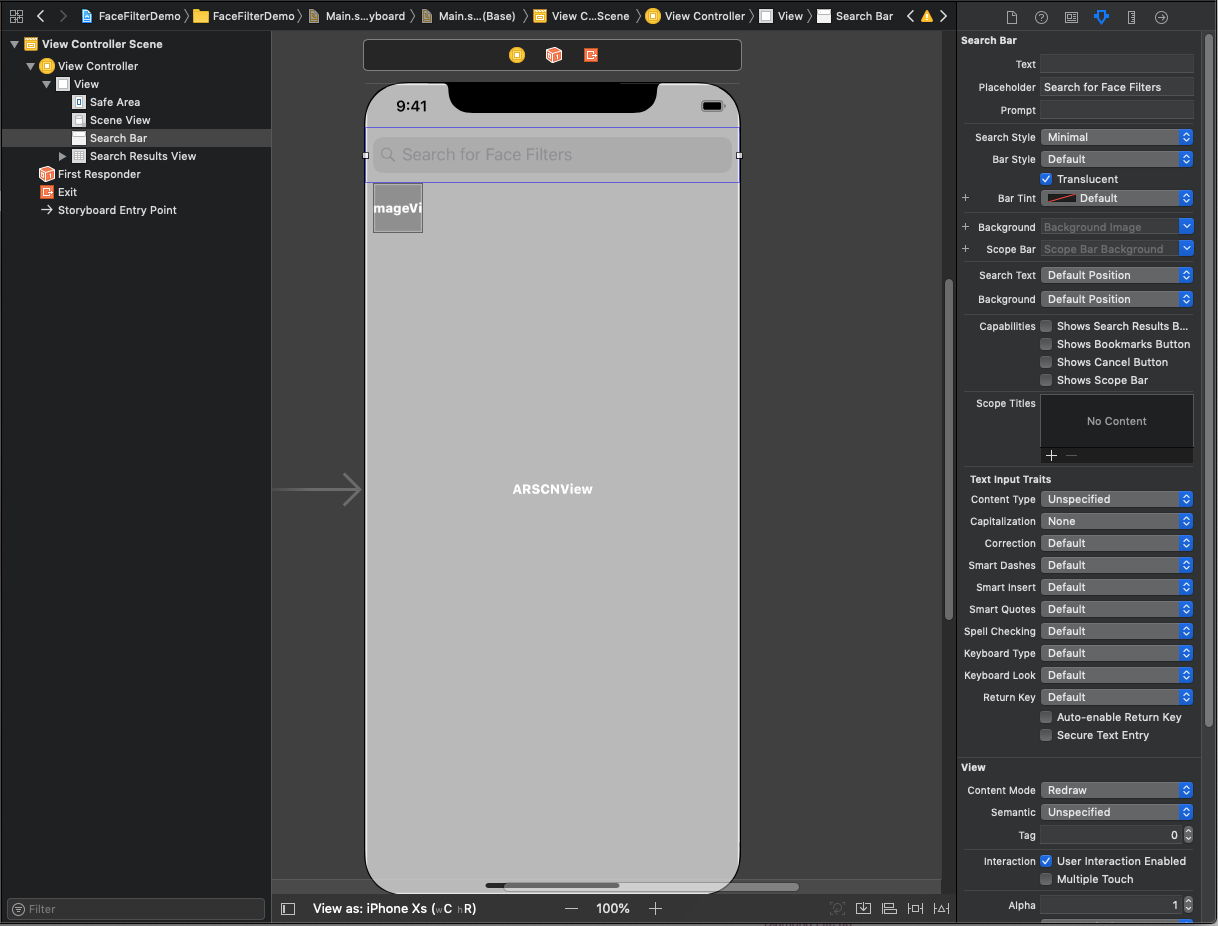
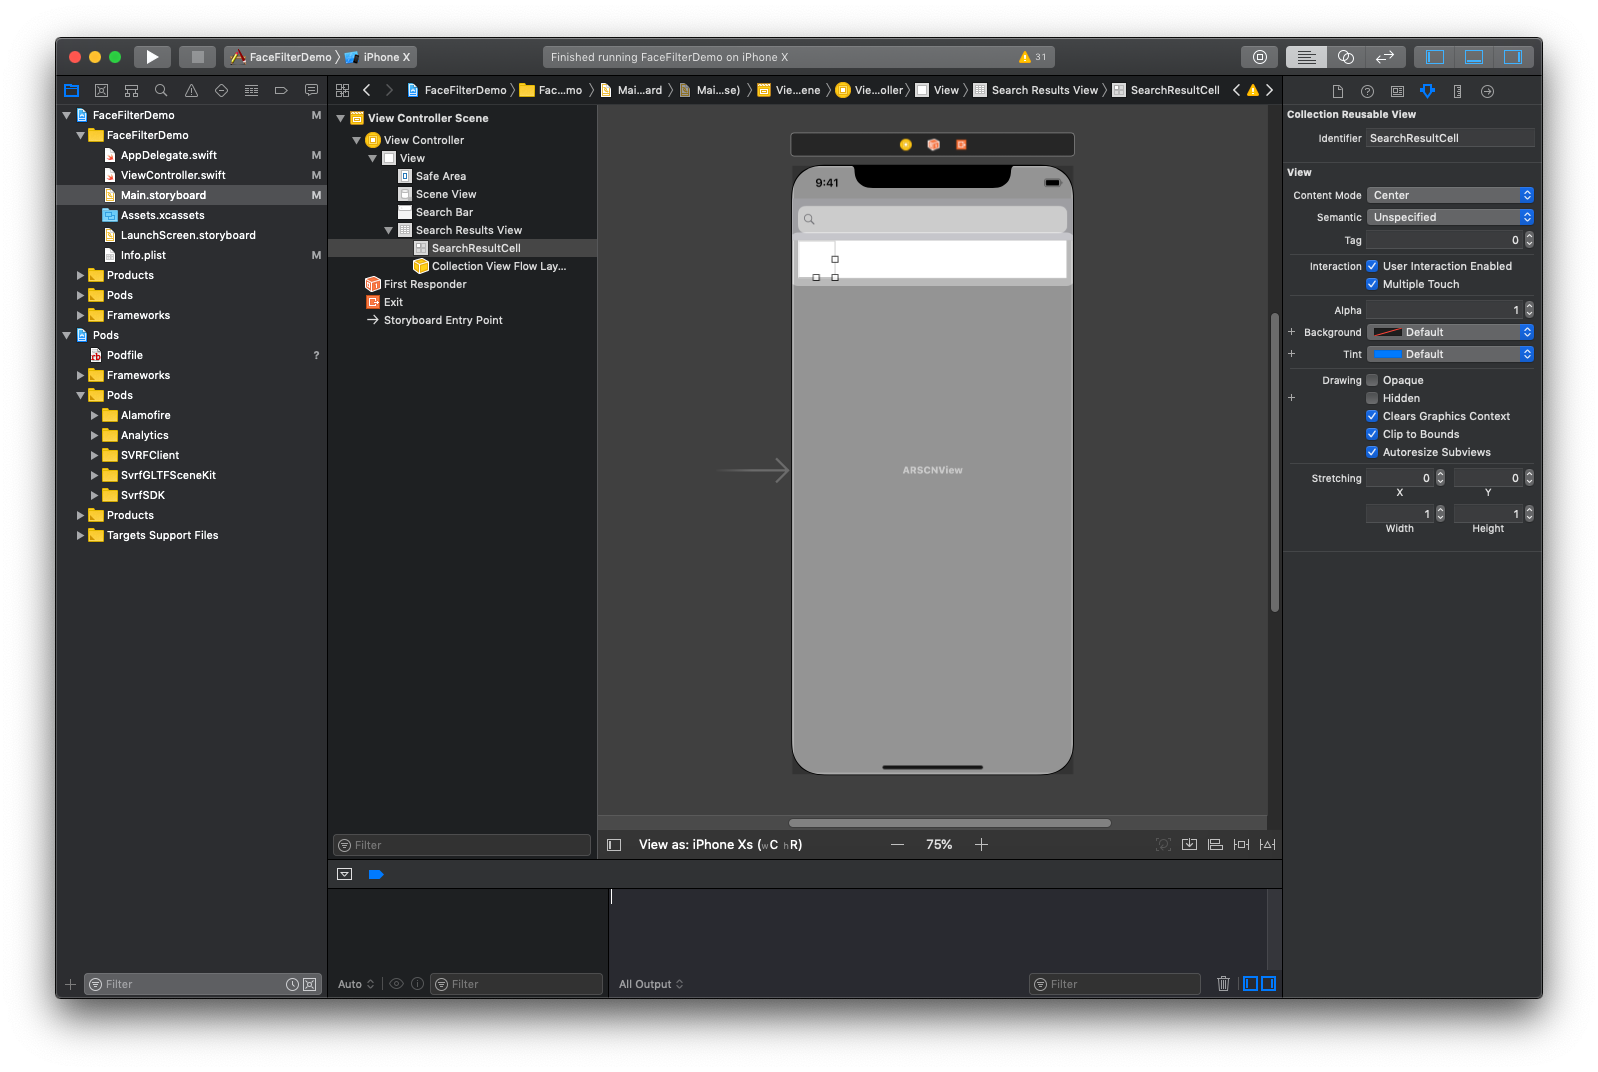
Now let's create a basic layout for our application using Interface Builder. Our application needs an ARSCNView to display the ARKit scene, a text box to input searches, and a Collection View to display the results. Let’s add those components and wire them up:
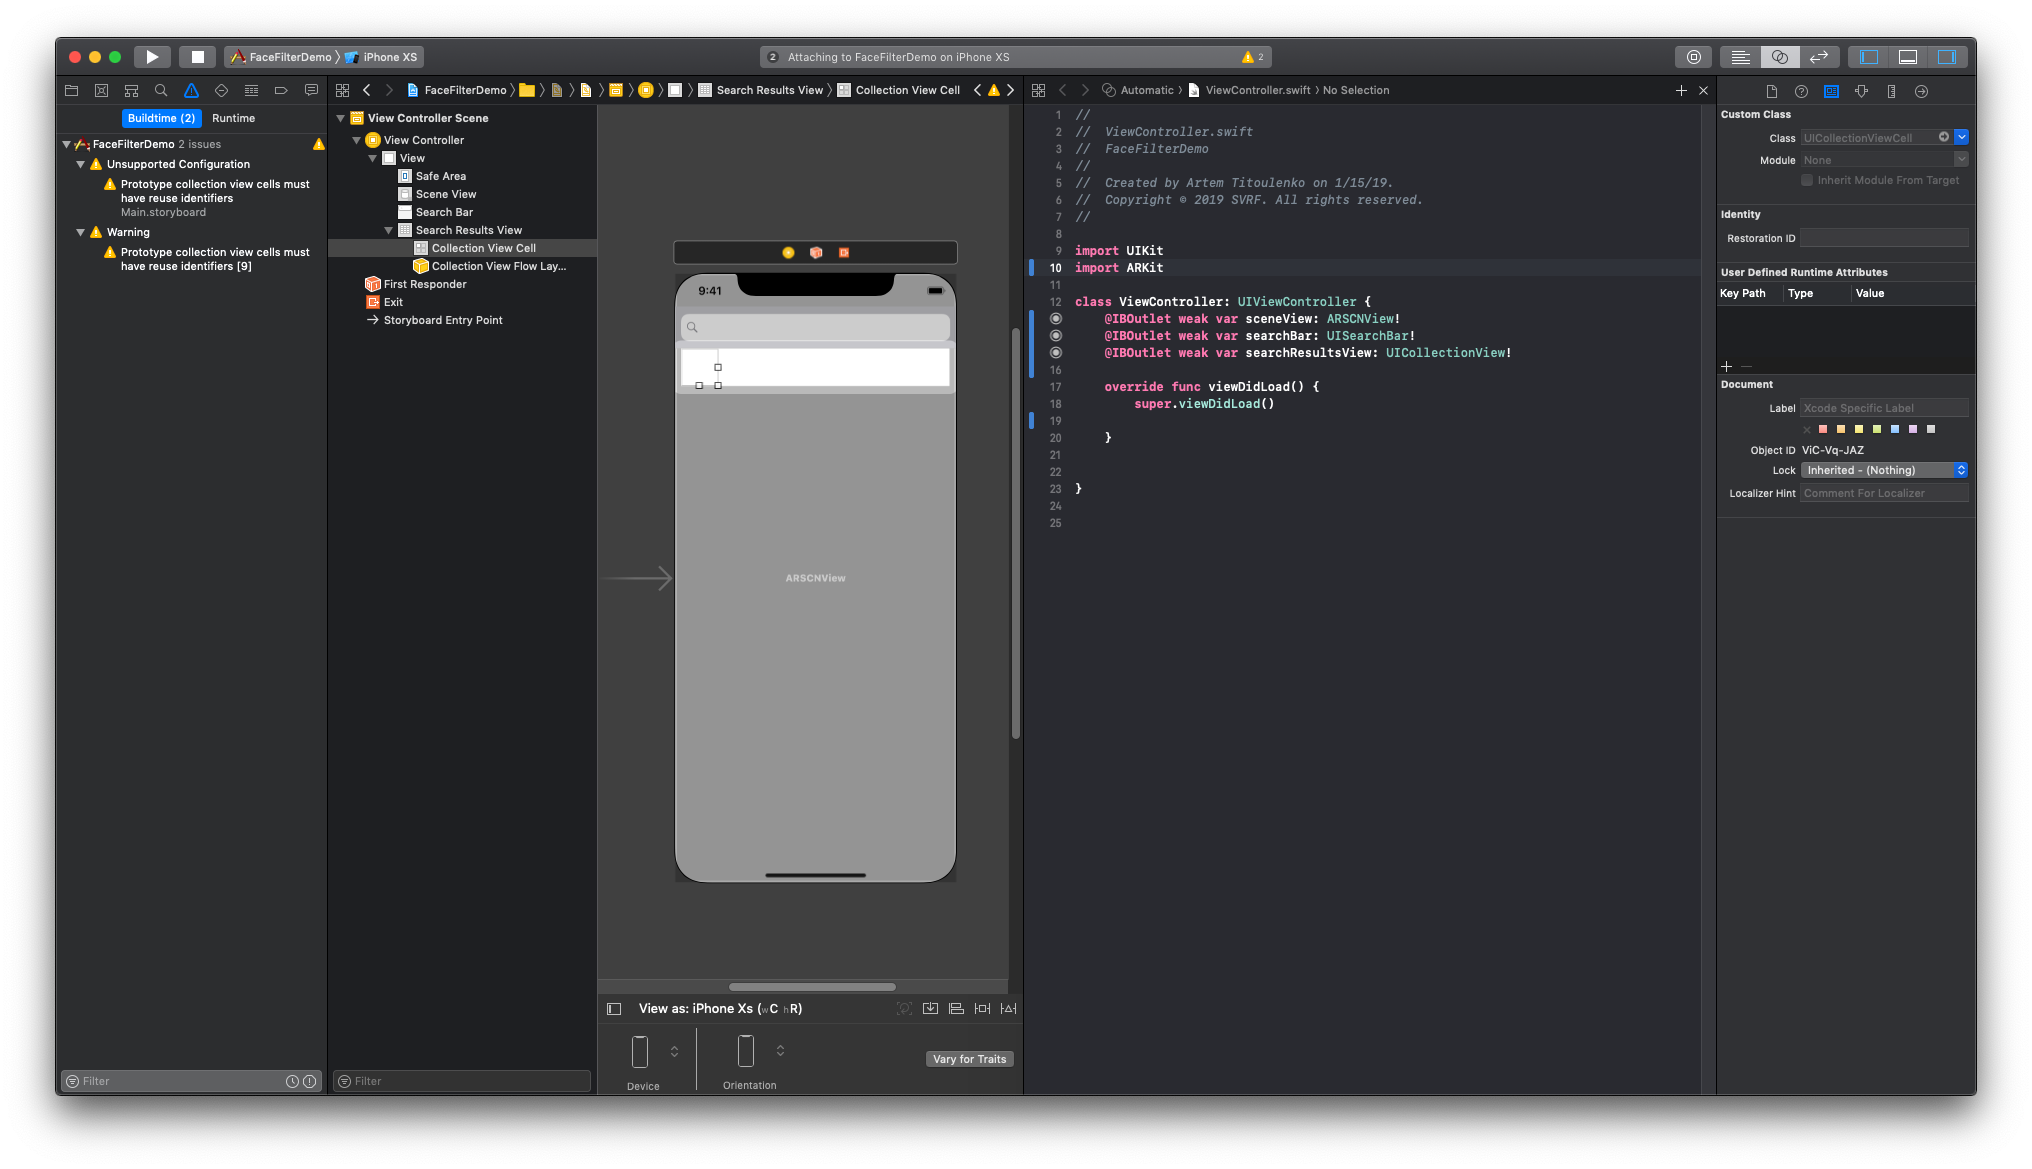
Make sure that the ViewController implements the UISearchBarDelegate protocol, and that the searchBar.delegate is set to self on viewDidLoad(). Set the background of the Search Results View to be "Clear Color", set "Scroll Direction" to Horizontal, and turn on "Bounce Horizontally".
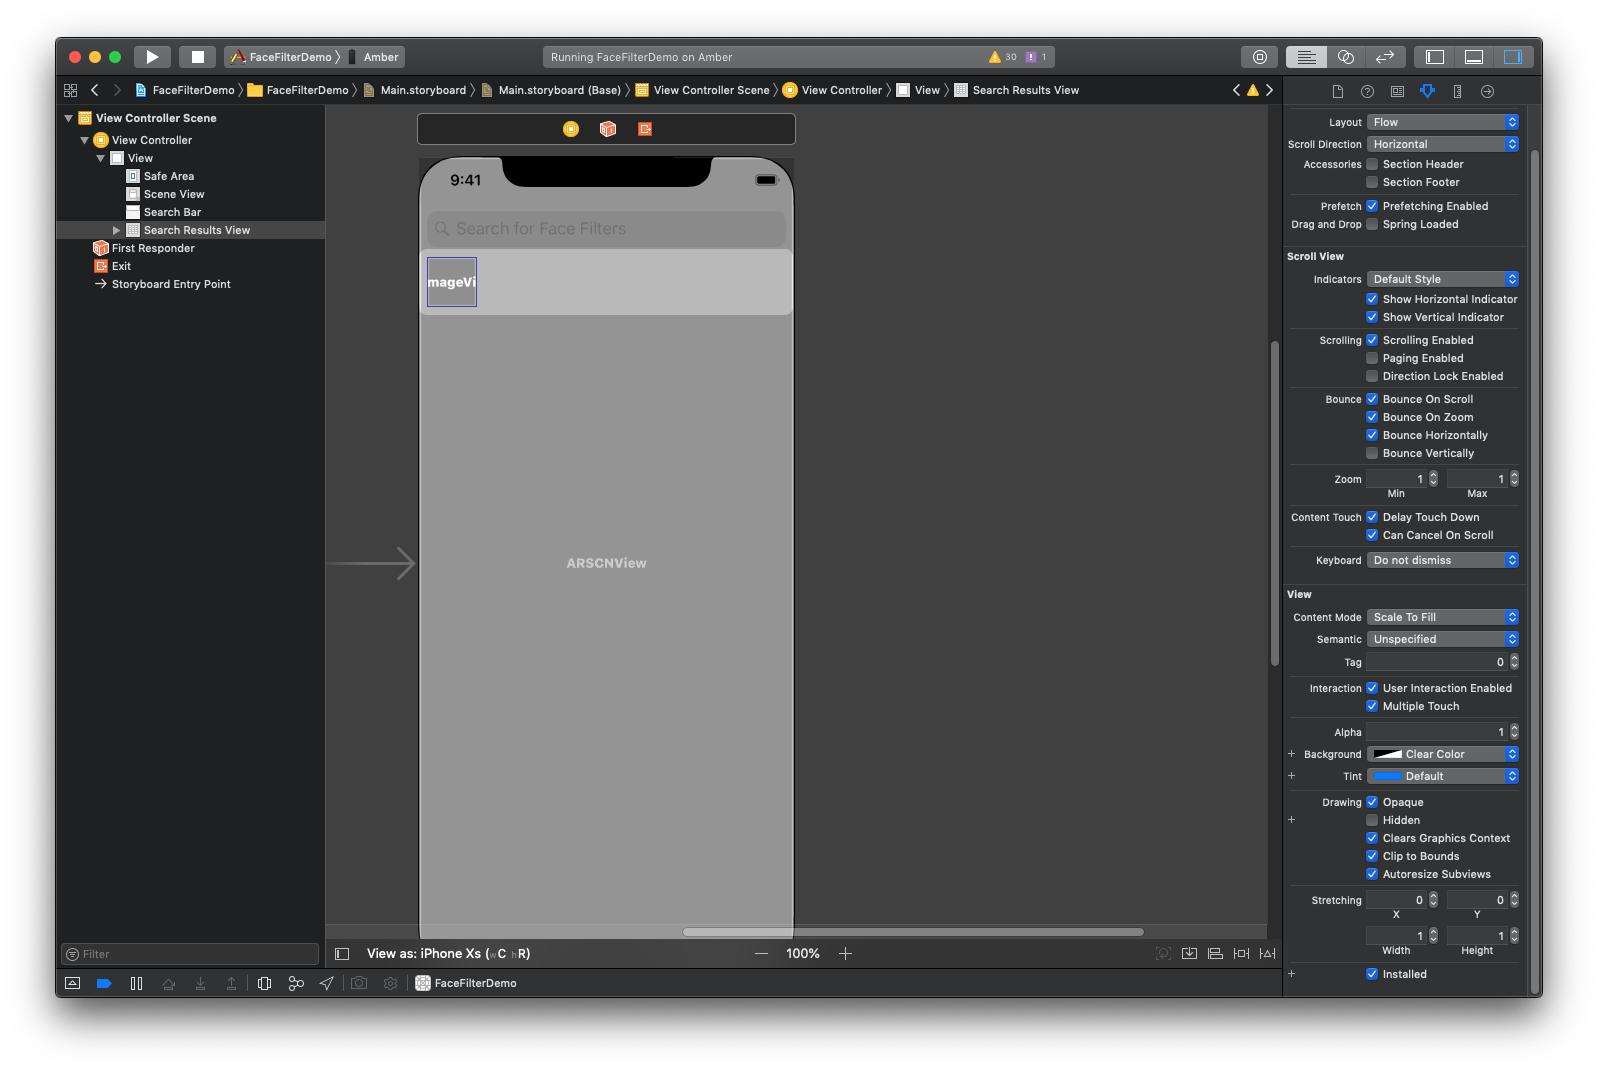
We can then set the "Search Style" of the search bar to "Minimal" to make it translucent and look like it's floating on top of the ARSCNView. We should also give it a more descriptive placeholder to show the purpose of the search bar. Let’s set it as “Search for Face Filters”.
Installing the SvrfSDK Pod
In order to query the Svrf API we need to install the SvrfSDK from CocoaPods. If you don't have CocoaPods installed, you should follow the installation guide on their website, or follow the SvrfSDK installation instructions to install the SDK directly into your application. In the root of the FaceFilterDemo folder create a file named Podfile:
Podfile
After you have saved the Podfile, close Xcode, open a terminal, navigate to the root of the project directory, and run pod install. This will install the SvrfSDK pod and it's dependencies. Now instead of opening the Xcode Project, you should open the FaceFilterDemo.xcworkspace file in the project root directory. You'll know you did it right if you see a "Pods" project alongside the "FaceFilterDemo" project in Xcode.
Creating and Adding a Svrf API Key
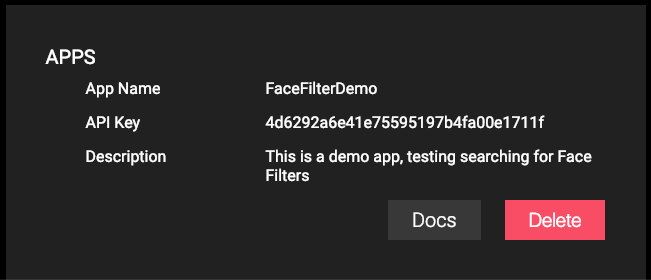
Accessing the API requires an API Key. You can get an API Key by logging into the Svrf website and navigating to your User Settings. At the bottom you can name your key and describe what it will be used for.

After you sign up, you should be presented with your API Key.
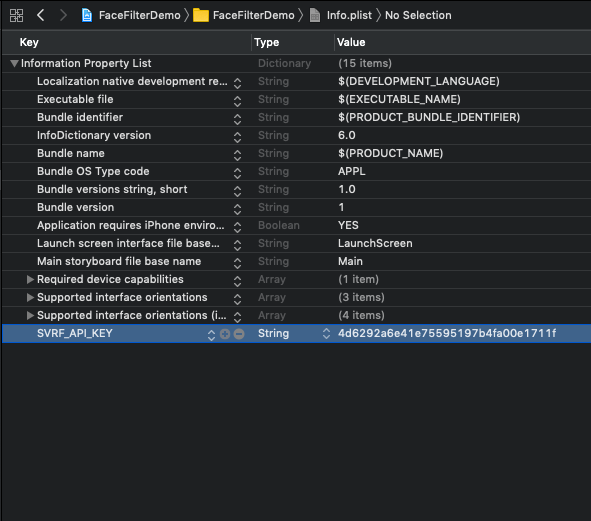
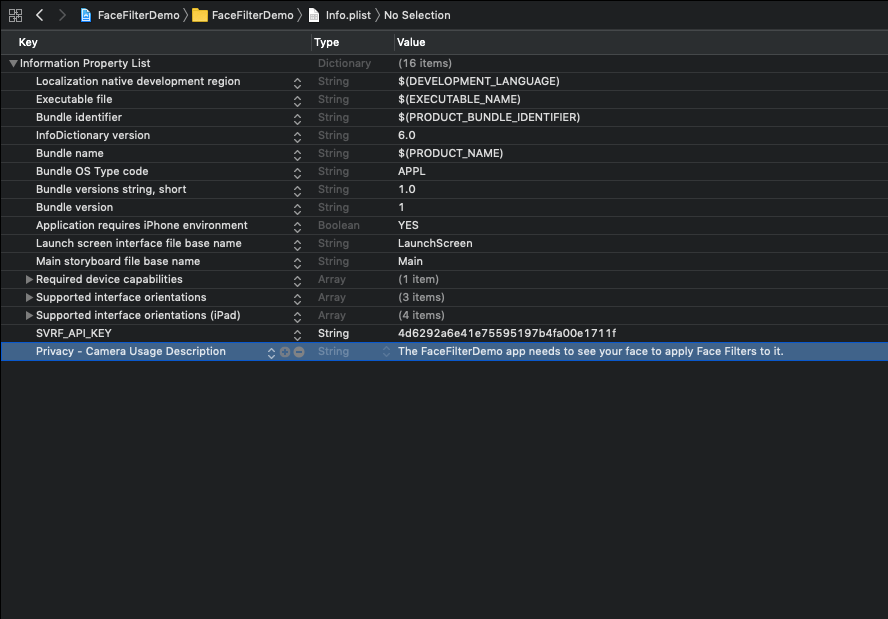
Add a property named SVRF_API_KEY to the Info.plist file whose value is your new API Key.
Authenticating with the Svrf API
To test that the key works correctly and to authenticate with the API, we import the SvrfSDK framework and call the SvrfSDK.authenticate method. A good place to authenticate is when our application starts: in the -application:didFinishLaunchingWithOptions: method of our AppDelegate.
AppDelegate.swift
After launching the Simulator, we should see the success text in the logs.
Searching for Face Filters
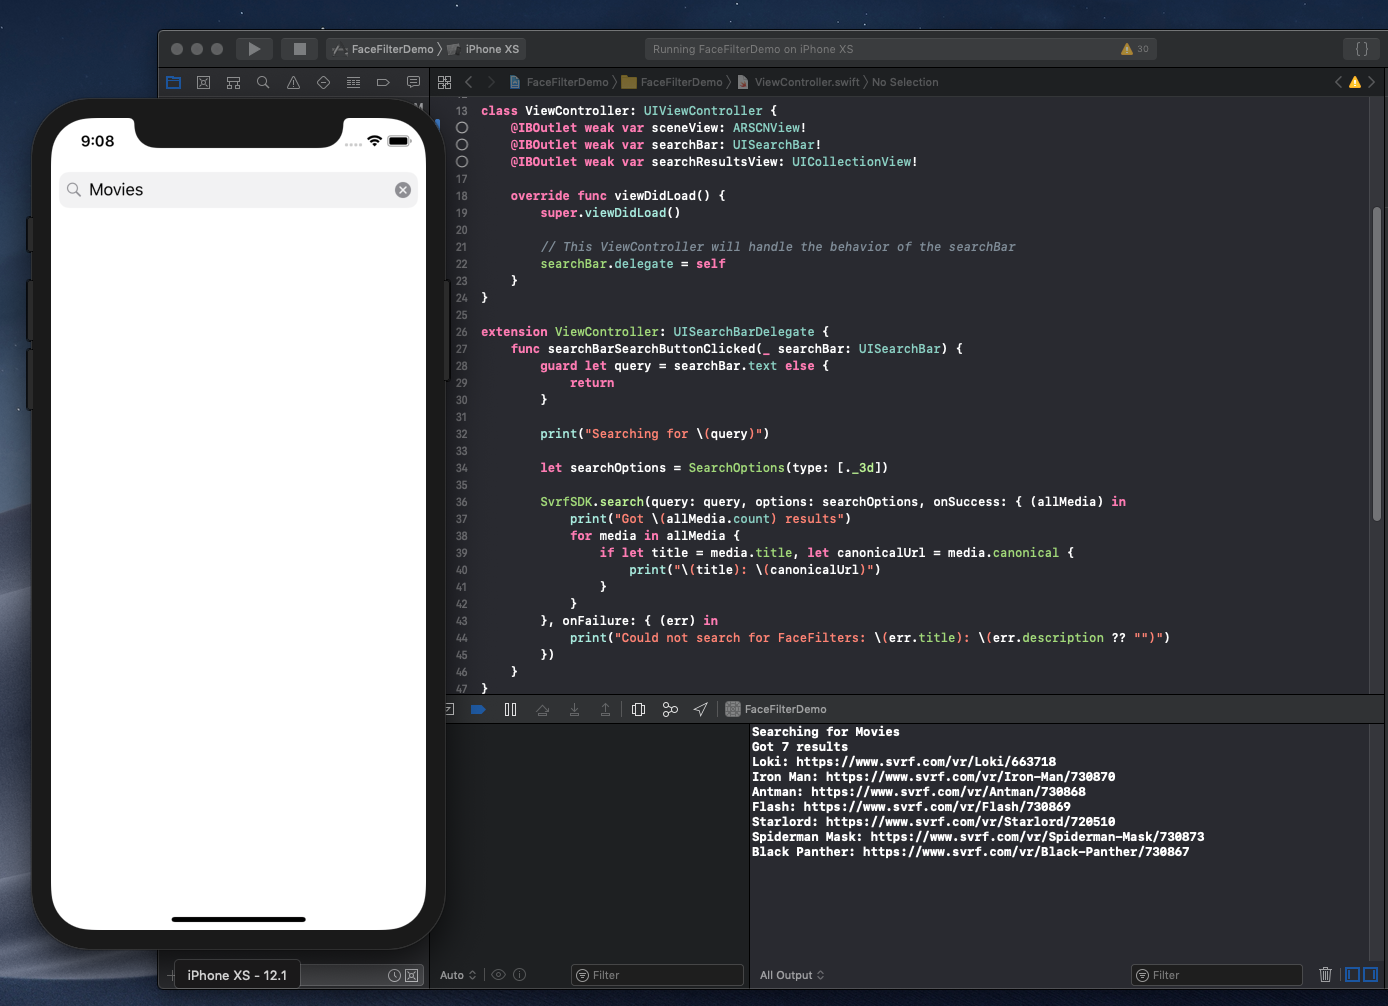
Now that we are authenticated with the service, let's search for some Face Filters! First we should wire up our search bar and the search results view as @IBOutlets in our ViewController. Then we specify that the ViewController implements the UISearchBarDelegate protocol, set the searchBar's delegate to self, and implement searchBarSearchButtonClicked(_:). We can then use the SvrfSDK to search for 3D Face Filters by calling the +search(query:options:onSuccess:onFailure) method of the SvrfSDK:
ViewController.swift
Searching for "Movies" Face Filters should show you how many results were returned for that query, along with the names and canonical URLs for those filters:
Console
Other fun Face Filters to search for:
- Breakfast
- Animal
- Meme
- Cute
- Comic Book
This is the most basic API usage, but there's a lot more that the SvrfSDK offers. You can fetch trending Face Filters, filter by a certain category, and also search through thousands of 360 photos and videos. You can get a feel for the content that we curate by browsing the Svrf website. Read onward to learn how to use these Face Filters in a ARKit Session where you can try on the superhero masks in the search results!
Displaying Search Results
Now that we know we can search for Face Filters, let's show them to the user in our Collection View and have them try them on.
Interface for a Search Result
First, we’ll show the user a preview of the Face Filter. Each SvrfMedia returned by the SvrfSDK.search method has a collection of rendered images under media.files.images which we will use to show a preview of the Face Filter. You can see additional properties that Media have in the Svrf API docs. UICollectionView requires elements which extend UICollectionViewCell, so we will make a class called SearchCollectionViewCell. This will manage the preview image view of a SvrfMedia. Our SearchCollectionViewCell class will contain a single method called setupWith(media:). That method will take a SvrfMedia, fetch an image from the URL at media.files?.images?._720x720, and set the fetched image to the image the cell is displaying.
SearchCollectionViewCell.swift
In the Interface Builder view, drop in an Image View into the search result cell view, ctrl+drag that image view into the SearchCollectionViewCell class as an @IBOutlet named imageView. Additionally specify that the SearchResultCell's class is SearchCollectionViewCell.

Showing All of the Search Results
In order to show all of the results of our search we need to implement all of the required methods for UICollectionViewDataSource and UICollectionViewDelegate in our ViewController.
ViewController.swift
Now set the searchResultsView's delegate and dataSource to be self so that the searchResultsView knows where to fetch its data from and how to draw the cells representing the data.
ViewController.swift
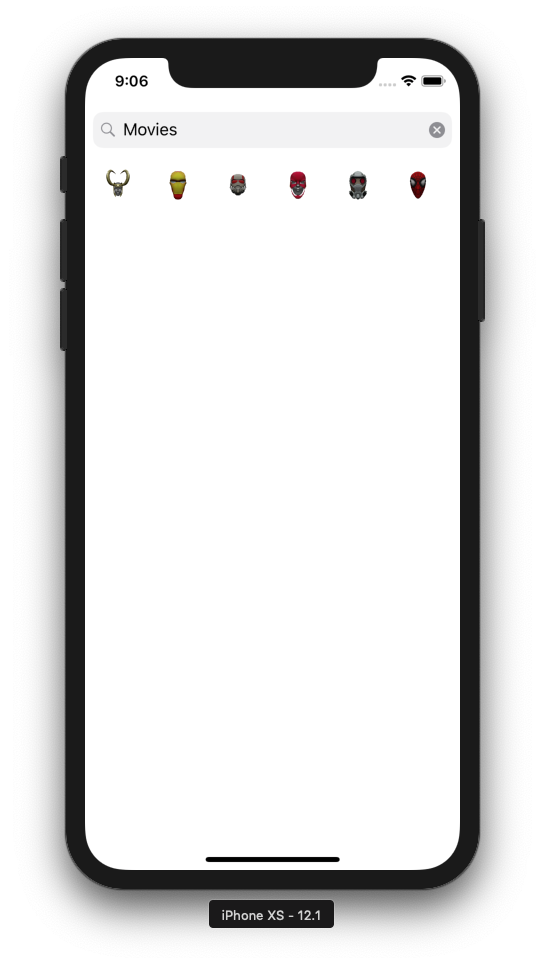
Now let's fire up the app and search for "Movies". When your search completes you should see several superhero Face Filters. Congrats, you're using the Svrf API!
Using ARKit and Trying On Face Filters
For the final part of our guide, we will allow the user to select a Face Filter and try it on. This step is more complex as it requires setting up the ARKit session, creating classes to manage the Face Filter's 3D model, interacting with ARSCNView, and applying the blend shapes that ARKit detects to the model being displayed.
Allow access to front-camera
First we need to add a NSCameraUsageDescription key to our Info.plist whose value will be a description of what our app will use the camera for.
Starting the ARSession
When the ViewController view appears we need to start the sceneView's session and tell it that we want to do face tracking with the ARFaceTrackingConfiguration. When the view will disappear, we should pause the session so as to reduce CPU usage.
ViewController.swift
Representing a Face Filter as a SCNNode
In order for our Face Filter to be used in the ARSCNView session, we need to be able to represent it as an SCNNode. Our Face Filters come with a variety of 3D model formats, but we always have glTF models. For your convenience the SvrfSDK includes a method called +getFaceFilter which will fetch, parse, and convert the glTF model for a Face Filter into a SCNNode hierarchy. The SCNNodes also have blendshape data attached if the original glTF model has weights defined for it.
RemoteFaceFilter.swift
Giving the ARSCNView a Delegate
Our preferred approach to managing multiple Face Filters is to create a VirtualContentUpdater class which will manage a virtual face node (which represents your face). The VirtualContentUpdater will also implement ARSCNViewDelegate and pass changes to the ARFaceAnchor (a class defining a virtual mesh of your face) to the virtual face node. This way we can offload the resource management to another class (RemoteFaceFilter) which will be responsible for fetching and loading the 3D model data from a SvrfMedia. It's worth carefully reading the documentation for ARFaceAnchor as it gives a great overview of what kind of data it can give you and how you should use it. The following VirtualContentUpdater contains its own root node (faceNode), and a RemoteFaceFilter whose blend shapes it updates when the user moves their face.
VirtualContentUpdater.swift
Finishing Touches
The last step in the process is to wire up all of the new behavior into our ViewController so that a user can actually try on the superhero masks they were searching for. We will create a new VirtualContentUpdater called contentUpdater, a new RemoteFaceFilter, assign the sceneView's delegate to contentUpdater, and make contentUpdater keep track of remoteFaceFilter.
ViewController.swift
So now we can tell the remoteFaceFilter to load a new Face Filter from a tapped search result:
ViewController.swift
And finally lets clean up the methods called by the search bar when a user searches or taps "cancel" so that they close the keyboard:
ViewController.swift
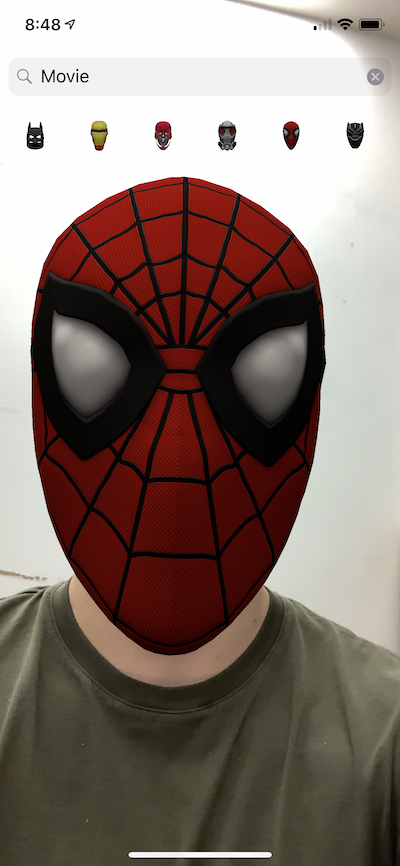
Now let's try on those superhero Face Filters!
Going Further
We have scratched the surface of what you can create with the Svrf API and the Svrf SDK for iOS. Head over to the Svrf Developers Site to explore API clients in a variety of languages and to see what other content you can discover through the Svrf API. To see a more complete Demo app with error handling, loading spinners, and reset buttons check out https://github.com/SVRF/svrf-api/tree/master/examples/ARKitFaceFilterDemo.
- Learn more at https://developers.svrf.com
- Svrf iOS SDK
- Other Svrf API examples
- Svrf Website
- SvrfGLTFSceneKit, our glTF loader
About the Author
Artem Titoulenko is a Lead Architect at Svrf.